🔐 SSO / SAML
Docflo supports Single Sign-On (SSO) via SAML 2.0, allowing your organization to authenticate users through your identity provider. This guide walks through configuring SSO using Azure Entra (Azure AD) SAML.
Step 1: Create an Enterprise Application in Azure Entra
In the Azure portal, create a new Enterprise Application and configure it for SAML-based sign-on.
You will need the following values from the Docflo platform to complete the setup:
- Reply URL (Assertion Consumer Service URL)
- Identifier (Entity ID)
Copy the Reply URL and Identifier from the SSO configuration page in Docflo.
For detailed instructions on registering a SAML application in Azure Entra, refer to the official Microsoft documentation:
👉 Register a SAML app in Azure Entra External ID
Step 2: Retrieve Sign-In / Sign-Out URLs and Certificate
Once the Enterprise Application is created, navigate to the SAML Signing Certificate section of your app and collect the following:
- Sign-In URL - used to initiate the SAML authentication flow
- Sign-Out URL - used to terminate the session
- Certificate (Raw) - download the raw certificate file; you will need to upload it to Docflo
Step 3: Create Security Groups and Configure Role Claims
Create 4 security groups in Azure Entra that correspond to the role names used in Docflo. These groups will be propagated as roles via SAML claims.
⚠️ Important: When configuring group claims, make sure to select "Cloud-only group display names" as the source attribute for the group claim. This ensures the group names are correctly passed as role values.
✅ Also required: Enable the "Emit groups as role claims" option so that the security groups are included in the SAML assertion as role claims that Docflo can map to platform roles.
For full instructions on configuring group claims in Azure Entra, see the official Microsoft documentation:
👉 Configure group claims for applications with Azure AD Connect
Summary of group claim settings
| Setting | Required value |
|---|---|
| Groups to include | Security groups mapped to Docflo roles |
| Source attribute | Cloud-only group display names |
| Emit as role claims | ✅ Enabled |
Step 4: Update SSO Settings in Docflo
Once you have all the required values from Azure Entra, navigate to the SSO configuration page in the Docflo platform and fill in the following fields:
- Sign-In URL
- Sign-Out URL
- Certificate (paste the raw certificate content)
- Role group mappings (map each Azure security group to a Docflo role)
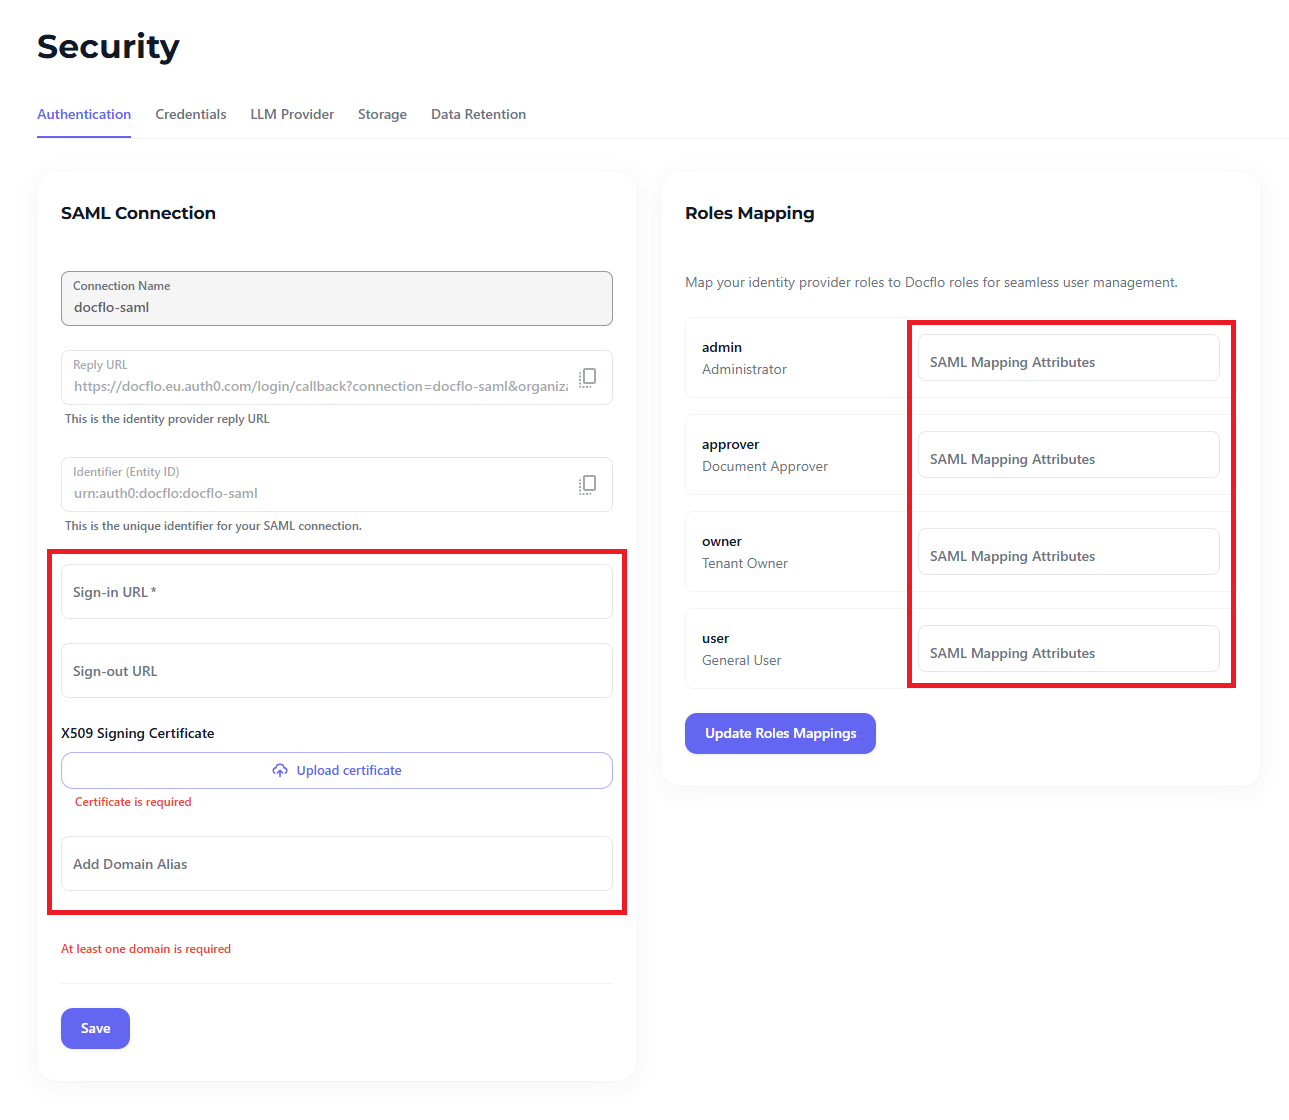
Save the configuration and test the SSO login flow to verify that authentication and role assignment work as expected. Users from updated domain name will be forwarded to your IDP from now on.